Showing posts with label CTMH. Show all posts

Thursday, December 10, 2015

Christmas Accordion Display Card


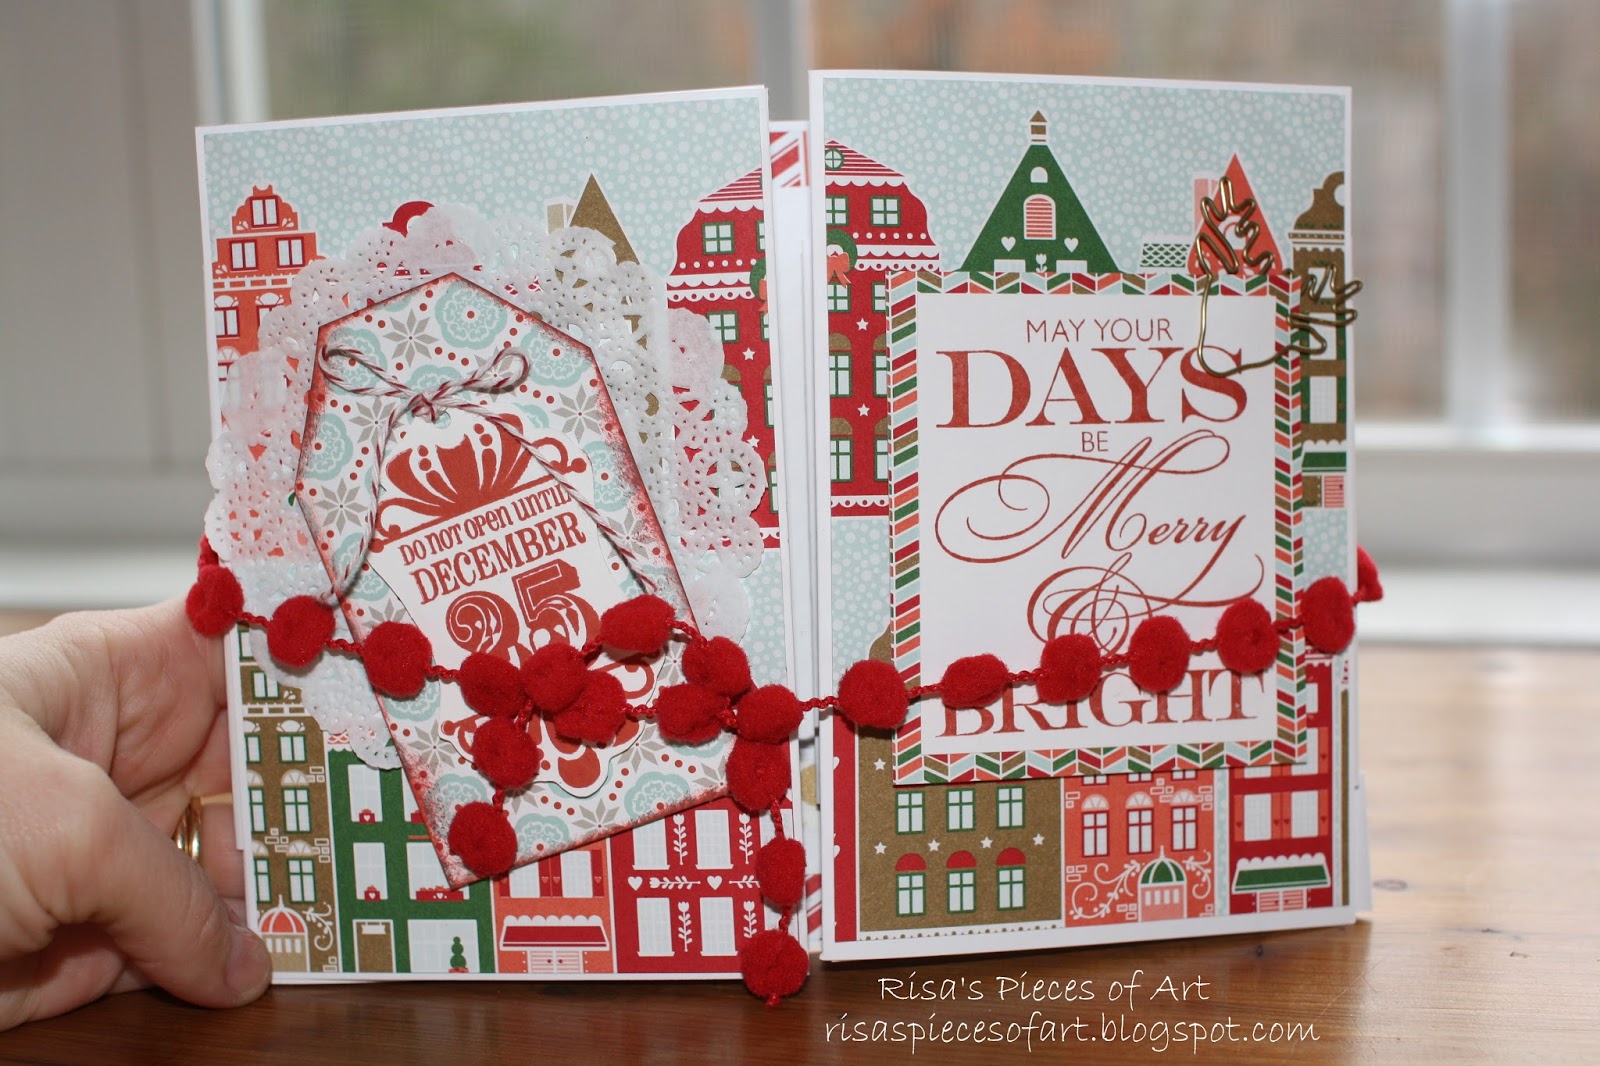
I had a lot of fun piecing together this accordion display card using the Nordic Noel paper pack (on clearance!) and Nordic Noel buttons and red pom-pom trim from Stampin' Up.  The pattern came from a card kit from the uber-talented Christine Adams with CTMH.  It actually uses two 12 x 6 strips of cardstock that you adhere together to make a double-wide accordion card that has so much dimension and is truly a gift in itself!

Here it is unfolded--feel free to click on the image to make it larger and in more detail:


 Here is both of the right and left front covers.  I just LOVE those gold reindeer paper clips from the current SU holiday catalog!  Sentiments are from the Frosted WOTG stamp set (CTMH) and the 2014 October SOTM (CTMH, both retired) stamped in Cranberry ink:


 A few peeks at some of the inside facets of the card...

 (Sentiment above is from Card Chatter Christmas, CTMH, retired)


And one more time all closed up!

Other supplies used: Tim Holtz tiny attatcher, white 3" Wilton doilies, gold polka dot washi tape (CTMH)

Give Thanks Hinged Display Tray


 Here today with a really fun project, courtesy of the uber-talented paper crafter, Brenda Rose!  She put together these GORGEOUS craft kits using CTMH's Sangria paper pack last month, and I was blessed enough to snag one (before they sold out!) and make it up for my aunt and uncle for Christmas this year.

Here are a few up-close shots of the details!  The rolled flowers were very fun to make--I used Alene's Tacky glue to hold them together.


All the words, stickers, flowers, hearts, leaves, etc were part of the kit and most are complements for the Sangria paper pack in the CTMH catalog.


This is the poem that Brenda enclosed in the kit--I just LOVE it!  Feel free to click on the image below to read it in greater detail...


Right-side of the display...

Left-side of the display...

I am very pleased with how it turned out, and I trust it will be a treasured keepsake for many, many years to come!

Sunday, November 29, 2015

Woodland Embossed Gift Box


I had a lot of fun this morning trying out a new technique--embossing AND stamping using an embossing folder!  I love the 3-dimensional effect this technique creates, and I think you will, too!

I used this card and tutorial for inspiration to make my gift box, as well as the Stampin' Up Woodland embossing folder, cocoa and white cardstock (CTMH), Cocoa and Outdoor Denim inks (CTMH) and a rubber brayer.  The gift box is also from CTMH (retired) and has a magnetic flap enclosure to keep photos, note cards, and mementos nice and safe!

Using the rubber brayer, I rolled Outdoor Denim ink onto the embossing folder (the side printed "Sizzix") and then stamped three trees using the CTMH's Always Grateful stamp set in cocoa ink on the same side of the embossing folder.  Then, I placed the white cardstock in the folder and ran it through my Cuttlebug.


Here's an up close view of the awesome texture of the embossed trees!  Finally, I did this a second time (without stamping the trees) and cut down the embossed cardstock to cover each side of the box, matting it with cocoa cardstock.

I am really excited with how it turned out, and I can't wait to gift it to a friend (or my MIL who LOVES trees) this winter!  I also am eager to try this technique to make a few note cards, too!


Wednesday, November 18, 2015

Embossing Frenzy

What is a papercrafter to do when she is down to just a few scraps of luscious, white-core cardstock?  Why...use her embossing folders and use every.tiny.scrap to make fun cards and layouts, of course!

The fun thing about embossing with white-core cardstock is you can lightly sand away the top of the paper and see the white peek through on the embossed design--oh so pretty!!

Here's a fun card I pieced together (inspired by Karen Pedersen) using bits of embossed cardstock scraps, a few punches (1" circle and flower from SU), and a black archival ink pen:


Here I used various embossed bits of cardstock (Damask CTMH embossing folder and cardstock) to piece together a background for a scrapbook layout....


Here's a close-up view after sanding and distressing...


A few more cards using a butterfly punch (Martha Stewart), a circle punch (1 1/4") and some thick twine from CTMH in Thistle.  Love popping up that middle butterfly with some 3D foam tape!


Love me some chevron and washi tape, of course (CTMH Chevron embossing folder)!!


Well, I hope this post has inspired you to NEVER through out any bits and pieces of your quality white-core cardstock!  They are fun to work with and really POP with your embossing folders!

Nordic Noel Christmas Cards


When the holidays approach, I tend to hit up craft therapy to keep me calm and content!  Here are some fun Christmas cards I whipped up using CTMH's colonial white die-cut cards and Stampin' Up Nordic Noel paper pack (both on clearance!).


My favorite part is in the details--feel free to click on each image to see it closer and more indepth.  I love the red pom-pom trim and Nordic Noel buttons, and especially the gold-tone reindeer paper clips (all from SU!).


Papers used: Nordic Noel (SU!)
Ink: Cranberry (CTMH)
Stamps: Frosted WOTG stamp set (CTMH, retired), Pear and Partridge WOTG stamp set (CTMH, retired)

Monday, October 20, 2014

Owl Baby Girl Card

How can a Halloween stamp set be used for a baby girl card?

Easy!

I paper pieced this adorable owl with pink chevron patterned paper (Ivy Lane, CTMH) and let her peek through a hold punched out of a wood-grain embossed pieces of Crumb Cake cardstock (SU).  I love how she turned out!

Supplies used:
Sentiment: wood-mount stamp from Michael's, source unknown
Owl: What a Hoot (CTMH)
Ink: Black
Smoothie baker's twine (CTMH)
Woodgrain embossing folder (SU)

Friday, October 17, 2014

Thankful Tree Card

I recently purchased some alcohol blending markers from Stampin Up--they are called Blendabilities.  It was fun to use them to color and shade this gorgeous oak tree!  I definitely need some practice with shading, but I like how it came out!

Stamp set used: Country Born (CTMH), Autumn Splendor (acorn, CTMH)

Inks: StazOn ink for the vellum, Memento black ink for tree

Cardstock: Chocolate, Bamboo, Timberline patterned paper (all CTMH); vellum (SU)

Embossing folder: wood-grain (SU)

Thursday, October 16, 2014

Apple Harvest Card


I recently purchased some alcohol blending markers from Stampin Up--they are called Blendabilities.  It was fun to use them to color and shade these apples, basket, and grass.  I definitely need some practice with shading, but I like how it came out!  And I love this sentiment!  My mother-in-law says this all the time to our kids...it is so cute :)

Stamp set used: Country Born (CTMH), Memento black ink

Cardstock: Chocolate, Olive, Ruby cardstock (all CTMH)

Embossing folder: wood-grain (SU)

Monday, September 1, 2014

Woodgrain Cards in an Instant


 Back again today to share with you a few more woodgrain embossed cards that I made using MAMBI's Cards in an Instant sentiments, which I scored from Michael's craft store.  I used either a kraft-colored cardstock (crumb cake from SU) or a white cardstock and ran it through the woodgrain embossing folder (from SU) using my Cuttlebug machine for the card backgrounds.  Then, I either backed the sentiment card with patterned paper or popped it up using foam tape and adhered it on the card front.  The cards were either embellished with pink enamel dots (flamingo dots, CTMH) and/or houndstooth washi tape (also CTMH) for some added interest.

This card was featured on my previous blog post by itself...but here's another shot of it in the grouping...


 This one features the white woodgrain (LOVE this look!) and pink chevron patterned paper (Ivy Lane, CTMH)...


 And this one features yellow patterned paper (Pemberley, CTMH) and the polka dot embossing folder (Cuttlebug) used on white cardstock for an added layer on top of the kraft woodgrain base...


These sentiment cards were a cute (and affordable!) find--check them out here to get an idea of all the ones included in the pack.  They made up into such fast, easy, and cute & trendy little cards!  Gotta love that!

Friday, August 29, 2014

Fall Leaves Woodgrain Cards


Wanted to share with you a few fall cards I made using my new woodgrain embossing folder.  I just LOVE how they turned out!  I am a big fan of birch trees for their white bark and gorgeous fall leaves, and when I saw this card on Pinterest, I knew I just had to get busy with my white cardstock and woodgrain embossing folder (SU) and crank out a few like it of my own!

Basically, I ran the white cardstock through my Cuttlebug and then swiped the raised pattern with Bamboo ink (CTMH) directly from the inkpad.   I love how this technique really made the grain POP!  Then I stamped and fussy cut several fall leaves using the Autumn Splendor stamp set (CTMH, retired) using the "rock and roll" method with the following inks: barn red, creme brulee, goldrush, vineyard berry, and olive (CTMH). The acorn was stamped with chocolate ink and cut out, as well.


The sentiment is one of my FAVORITES for this time of year--a season that just oozes with GRATITUDE!  It is from CTMH's Always Grateful stamp set and states: "Gratitude turns what we have into ENOUGH"--SO TRUE!  I selectively inked the top of the sentiment with cocoa ink and the last line was inked with vineyard berry ink (both CTMH).  Then I backed it on Cocoa cardstock, cut it into a tag shape, punched it with a small hole punch and tied some brown baker's twine through, popping it up with some foam tape.

So I hope I've inspired YOU to play around with some fall crafting supplies today!  What a perfect way to tell someone how GRATEFUL you are to have them in your life this season!


Thursday, August 28, 2014

Woodgrain Embossing Folders

Hi there, friend!  Just wanted to share with you some things I have recently learned about embossing folders. This spring, I got a Cuttlebug machine and have really enjoyed playing around with all the embossing techniques you can do it.  However, I recently ran into some problems with the woodgrain embossing folder.  Let me explain.

I recently purchased my woodgrain embossing folder from Stampin' Up.  It was my first folder from this company--my others are CTMH (Close to My Heart) folders and I have one from Cuttlebug (bought from Michael's).  While the woodgrain embossing folder from SU was $1 cheaper than the one offered from CTMH, I immediately realized that you get what you pay for once it came in the mail!  Here you can see SU's folder (made by Sizzix) compared with CTMH's folder--big size difference!


 The other great feature about CTMH's folders is that they feature this little slit at the top.  This allows you to feed through cardstock strips to get a continuous pattern for 12x12 scrapbook pages, for example.  Love this feature and I have used it often on my pages and it is super easy to match up the pattern!


Well, the problem that I was running into with my woodgrain embossing folder was the cracking and tearing of the cardstock once I ran in through.   I usually emboss my patterns using white core cardstock (made by CTMH) and I am usually pleased with the results.  Here, here, and here are a few card examples I have tried and I love how the white pops through--I often sand the raised edges to give it a distressed look.  However, with the woodgrain, I wasn't getting a distressed-looking image--I was getting a cracked and torn look that I wasn't as pleased with.  Check it out below...


Apparently, after a Google search, I realized that this problem is not unique with me--a lot of people have had issues with cracking and tearing of paper (even using solid-core cardstock) with this particular embossing folder pattern.  So, I gathered some tips from these sources and tried a vellum cardstock shim and regular cardstock shim, and also tried to be careful to emboss with the grain.  I was still disappointed.  It didn't seem to matter whether I embossed with or against the grain, and the vellum shim simply tore apart after a few uses and didn't seem to help.

So what DID finally help?  Well, thanks to a friend of mine (thanks Anna!) who gave me some SU cardstock, I finally was able to emboss without the cracking issue using SU's 80 lb. weight cardstock.  I tried Early Espresso and Crumb Cake and was very pleased with the results.  No tearing.  No cracking.  No need for shims.  No need to fuss with the grain of the paper.  You can see the difference below! 


So now I have the option of the solid look AND the distressed look, on whatever color cardstock I choose!  Bonus!

Hope this might help you if you get stuck with this particular embossing folder pattern!  Hope you have a creative day and thanks for stopping by!
Monday, May 26, 2014

Be Still Canvas Frame

 Last week was a bit of a crazy one!  We got the news that my Dad took a nasty fall and suffered a vertebral fracture, landing him in the trauma center flat on his back and awaiting extensive surgery.  Our family lifted up many prayers for his healing and comfort (and continue to do so), and yet, we also felt it hard to be so far away (he was several states away) and not be able to do something.  Well, that is where papercrafting came to the rescue!  We were not only able to send him cards (hand-drawn by the kids, papercrafted by me, and store-bought), but I was able to put together this little 4x4 canvas frame for his bedside!  

Let me tell you how I put it together (it was a quick and fun little project!).  I found the canvas in a frame from Michaels--it was on an endcap near their framing department with all the artistic canvases (they also sell a white frame version).  Then I picked out two black-and-cream patterned papers from my stash (a newsprint and a damask print from SU).  I cut the damask into a 4x4 square to fit the canvas and adhered it with Tombow permanent adhesive.  Then, I tore two corners from the newsprint paper, inked up the torn edges with Desert Sand ink (CTMH) and a sponge and adhered these down in the corners.  For the sentiment, I used one of my favorite stamps from CTMH, Be Still, stamped in black ink (Versamark) on colonial white cardstock.  I inked it up the colonial white cardstock with Desert Sand ink and matted it on Bamboo cardstock, then adhered it to the canvas.  Lastly, I used some metal cross embellishments (Michaels) popped up with 3D foam tape--you can see the dimension it provides in the next pictures...

I really love how it turned out!  It sits up using a little dowel rod/hole system (or it can be hung) and I pray it will be a source of encouragement for my Dad as he convalesces with family for the next several weeks!  I love when my passion for papercrafting can be used by God to bless and encourage others, especially those near-and-dear to my heart!  I hope you, too, can be a bright spot in someone's day with your craft, my friend!

Sunday, April 27, 2014

Ariana Display Card

 This weekend I had the pleasure of creating this beautiful display card using Christine Adams' kit (inspired by Brenda Rose).  It showcases the beautiful Ariana, Balloon Ride, and a bit of Skylark patterened papers from CTMH.  Wow--what a show stopper!!  I feel so blessed to have been taught how to make this beautiful card using 2 sheets of Slate cardstock and some precut papers; the pattern was included in the kit, so I plan to try it out with different patterned papers in the future!  This card is basically a gift in and of itself!  As always, feel free to click on each picture to see it larger and in more detail!

Here is the card closed up and tied with a slate baker's twine bow...
 
Then you open the card up to see all sorts of various panels pop through!  All the embellishments used are from CTMH and include the Ariana dimensional elements, Ariana assortment (bows), slate twist ties, sparkle flourishes, and various Cricut die-cut shapes embossed with the damask embossing folder.
Here is a closer look at each panel...

 Closer look at the front two covers...
 LOVE this sentiment about life being like a camera!!  It says: "Life is like a camera…FOCUS on what's important, CAPTURE the good things, DEVELOP from the negative, And if things don't work out, TAKE ANOTHER SHOT.
 And another close up of that gorgeous camera--it even has a glass circle cover on the "lens" and a baker's twine "strap"! 
I plan to give this display card to a sweet family member of ours who is recovering from a broken hip!  I hope it brings a smile to her face and beautifies her room!  She can also adhere a picture on the back panel of her family or herself if she wishes!  Thanks again Christine for such a great kit!